Tasmota on the JR-TM05S Water Supply Timer
I recently bought a wifi enabled water supply timer JR-TM05S on Banggood. i hoped that this device would be ESP8266 based so that icould run tasmota on it and integrate it into my smarthome via MQTT..
I was lucky, it is based on ESP8285 which is 100% compatible with ESP8266 but has more memory! the necessary 4 pins are even routed to some contacts where you just need to plug-in a pin-header and solder it down, to comfortably program the device! the only slightly annoying part is, that the unit is covered in silicone to waterproof it. i think they have done a good job at that.. but we have to peel it off to get to the pin headers.
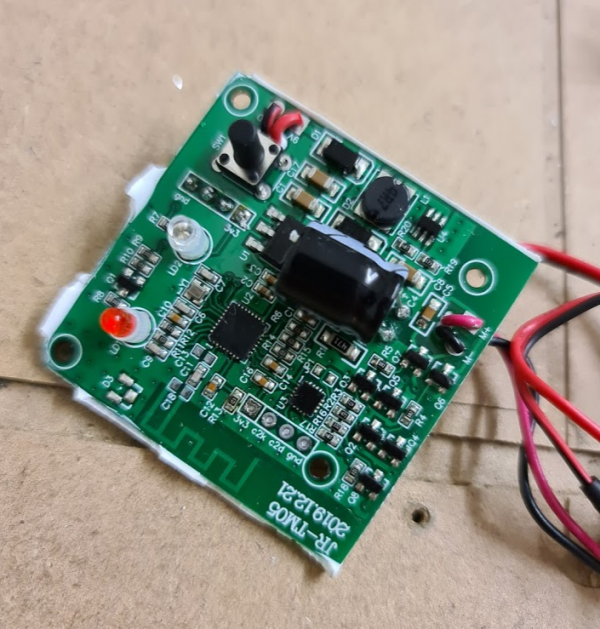
luckily the only button on the board is connected to GPIO0 which makes it also the flash-mode switch :)
so to prepare the unit, remove the big front-cover sticker and unscre the four screws in the corner, this will split open the case

now remove the board by carefully cutting away some of the white silicone from the back and also remove the silicone where the pi header next to the button is
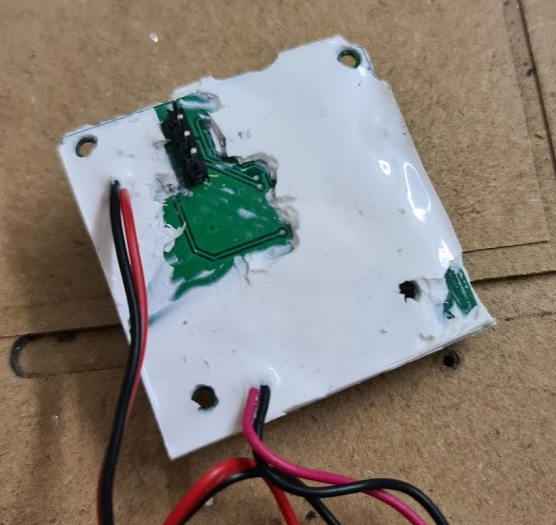
Pin header next to the button is used to re-program. the pinout is as follows (from pin closest to the outside edge of the board towards the inside of the board): 1.) GND 2.) TX 3.) RX 4.) 3.3V
connect those 4 to a programmer, no additional power supply is needed
press the button on the device while you plug-in the usb programmer, this will start the programming mode
install esptool.py
pip3 install esptool
make a backup of original firmware esptool.py -p /dev/ttyUSB0 read_flash 0x00000 0x100000 JR-TM05S.bin re-start programming mode and erase the flash
esptool.py -p /dev/ttyUSB0 erase_flash
re-start the programming mode again and flash the tasmota binary from the latest release
esptool.py -p /dev/ttyUSB0 write_flash -fs 1MB -fm dout 0x0 ../Downloads/tasmota.bin
unplug and power back on using the power cable that came with the unit, take your cellphone and connect to the tasmotaxyz wifi to configure tasmota
open a web browser and enter http://192.168.4.1
and there you go.. even the gpio pre-config seems to work right away, the button still opens and closes the valve and the toggle button on the web interface does the same :)
for the re-assebly i put the board back into the case and then sealed it again with some electronics-silicone. I sealed it so that the 4 pins would still stick out the back. After the silicon had dried, i bent the 4 pins 90° as otherwise the valve would not fit into the housing anymore. but by bending the pins that was taken care of, and they still remain accesible should i ever need them again